Here's an overview of a process that started in 2009 when I went to Stitches Midwest with my mother.
The first thing I saw that I liked that day was this fiber. I didn't buy it. Not then. We walked the entire floor and then I went back and decided that I did, indeed, need this fiber. Both of them. I didn't think at the time about how they were so very much "Duck" colors (our college football team). I just liked them, and I thought they were a good price.
The story continues in February of 2010 when they finally came back out of my stash to be spun up on the rented Ladybug wheel I had for the month. It was such a fun spin! I still love that wheel. I managed to spin both skeins to a fairly similar grist--or at least as similar as my skills allowed at that time. The yarn was lovingly tucked back into my stash with vague thoughts of ducky hats and other color-work possibilities. But I never fell in love with any of those ideas.
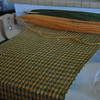
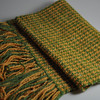
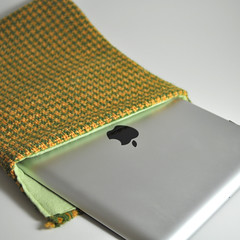
Then came weaving.. and the iPad. These pretty skeins of yarn were just enough to make an awesome sleeve for my new toy (or so I believed). And I set about calculating warp and weft and planning how the colors would go together. Houndstooth. I had plans for another houndstooth out of handspun, and I thought these would make an awesome first attempt.
Boy, howdy! They sure did!
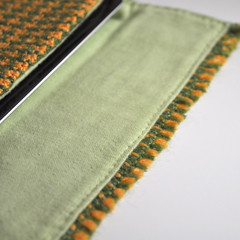
A scrap of flannel from JoAnn's remnant bin in an appropriately coordinating green was just enough to finish the project. I applied some of my bag making skills to this idea, incorporating a fold-over flap at the top. I love it! I just need to figure out some way to fasten it down. I wanted a magnetic strip, but didn't have anything strong enough (and I'm afraid of interfering with the electronics it will hold). But the bag is great!
I did have to give the flap a second round of sewing. My first attempt (still visible above) was a bit wobbly. Sadly even on a machine my sewing skills are lacking. I managed to very slowly and very painstakingly hand-seam the liner to the flap so that it came up to my standards of precision. I may attempt to go back over that carefully stitched line with my machine, or I may just trust that my own skills are good enough to hold until I wear out this fun bag.
Basic Stats:
Warp Length: 40" (this needed to be at least 12" longer, but came out okay anyway)
Loom Waste: 6" on each end (thus why I need a longer warp!)
Warp ends: 122 ends (122 for 10 inches + 2 ends to start/end on green)
Dent: 12
Woven Length: 24" (after washing)
Woven Width: 9" (after washing)
Thursday, April 28, 2011
Wednesday, April 27, 2011
April Stashdown
I walked into April a tad burned out from my frantic pace of knitting the Echo Flower Shawl (which has flown off to its new home). I haven't really wanted to look at complicated knitting and certainly nothing lighter than a middling finger-weight yarn.
So when I started spinning my Gothic Rose batts, I aimed for something a bit more substantial. And I achieved that in a lovely 3-ply yarn.
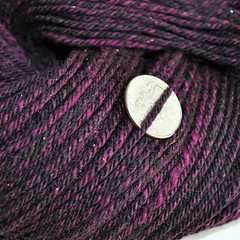
This yarn is about 8 ounces and approximately 300 yards of Worsted gorgeousness. Black and fuschia blend into a deeply gothic purple that is shot through with bronze angelina. It is sproingy and squishy and soft just like you'd like out of a yarn.
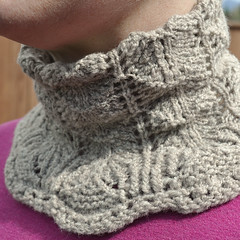
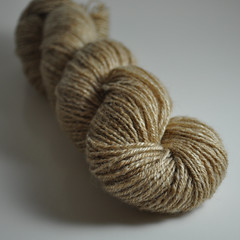
In addition, I pulled out a small skein of yarn I spun up last year. This is about two ounces of a fun blend of naturally colored wool. Cormo and Romeldale make up the bulk of it, but there is also a lovely and perceptible dusting of the elusive quiviut in there, as well. This spindle-spun yarn came out a wonderful slightly-uneven yarn with a lot of character. I'd been saving it for the right pattern, which presented itself in the form of the Yarn Harlot's "Pretty Thing". I thought this would be the perfect cowl, and it almost was.
Pretty Thing, for me, has one small flaw. The lovely flare derived from the way the pattern causes the fabric to bias flips out around my face like some sort of clown-ruff. Not attractive. I tried many ways of tugging it this way and that to no avail. So then I ripped back the final section of the pattern to try and alleviate the floppiness. Only, it followed the knitting down into the previously-firm-seeming knitting below and when bound off the cowl once again proceeded to look very ruff-like on me. As a final attempt to make the cowl more wearable, I tucked the final repeat of the lace pattern inside the rest of the cowl. Viola! Now it looks like an elegant collar when worn, and it is just snug enough to keep out even the stubborn gusts of wind. I still call this pattern a "win".
There is one more knitting project for the month, which was the reason for my "radio silence" earlier. But I am saving it for the "perfect" moment! You'll hear more about it, soon.
Weaving for this month is a handmade iPad case! I'd like to go into this project in a lot more detail. So that will come up in another post!
Labels:
Knitting,
Spindle,
Spinning,
Stashdown 2011,
Wheel
Sunday, April 10, 2011
Weaving -- why it rocks
With two skeins of fingering weight yarn, you can take a couple of weeks and knit a pair of socks. You can take approximately the same amount of time and knit a scarf. You might be able to eke out a shrug. But again, all of these things will take several days, if not weeks, of careful work.
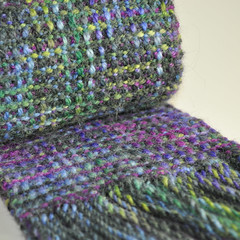
In two days (one day to warp, one day to weave), I made an entire scarf. And it's gorgeous and intricate and lovely and squishy and everything you'd want out of a scarf!
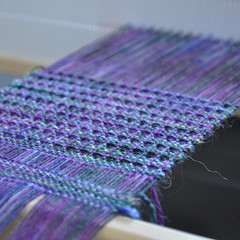
Shown above is the first few rows of weaving. You may notice that some of the lines of weaving "pop" out over the others. These are called "floats". You can have warp floats (the ones that go up and down through the weaving), or weft floats (the ones that go back and forth across the weaving). And in fact, when you make a warp float on the front, you automatically make a weft float on the back of the cloth. Pretty cool.
These floats make for some texture in the cloth. In addition, you can play with color.
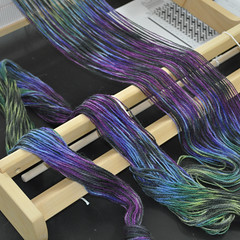
I played with color inadvertently. I'd planned a 3-yard warp and began to string my yarn out when I immediately noticed that it was "pooling". That is, color repeats were stacking up so that each color lined up next to itself in successive strands of yarn. Once I saw this happening by accident, I took steps to make sure that it continued to occur. There were several "breaks" in this yarn that I probably wouldn't have noticed when knitting. But they changed the color sequence, so it showed up immediately against the rest of the warp. I broke the yarn on purpose and realigned things to match.
One of the other amazing things that happens to weaving is how much it changes once washed. You can see on the first picture a very taught, even bit of fabric. But it is being held under significant tension. When you wash this weaving, the yarn relaxes and bends, snugging everything into place. At that point, you have a completely different (and still beautiful) beast.
For the nitty-gritty details of epi, draft, length, width, yardage used, yarn stats and some other pictures, please feel free to drop by my Ravelry Project Page for the Texture Scarf.
Labels:
Weaving
Monday, April 4, 2011
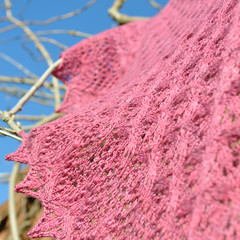
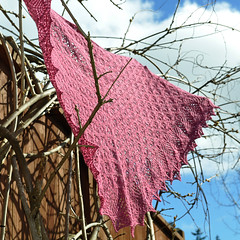
Echo Flower Shawl
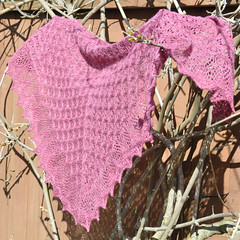
This has dominated my last month of knitting. This shawl is slated to be sent to a friend (the owner of Three Fates Yarns on Etsy) to be a sample to hang in her booth. It is laceweight Merino/silk, called "Lachesis" and it is hand dyed by Stephania.
And it is wonderful.
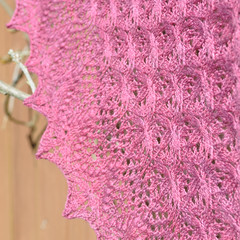
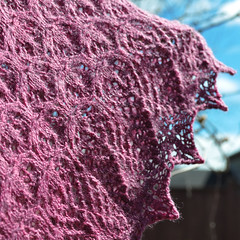
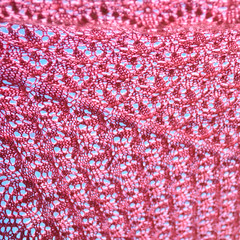
This is a really lovely yarn base, with just the right balance of spring, softness and sheen. It is strong enough to handle some very serious lace knitting (3-into-9 and 9-stitch nupps, for those in the know) and come out looking wonderful.
I'm very pleased with the project and very glad to have it done.
I'll leave you with a little gallery of just how pretty this shawl can be.
Labels:
Knitting
Sunday, April 3, 2011
A little cream on top
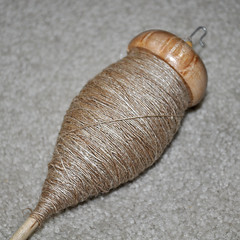
Just because it never hurts to go overboard with monthly goals, I have an additional two ounces to add to March's tally. This is just over two ounces of camel/silk blend which I have been spinning for almost a whole year. (I checked--I bought this fiber last May and it was to add to a small sample that was already in progress at the time.)
I started spinning very carefully and mindfully with an eye out for consistency of single. As time went by, my skills improved so things went faster, but I also finally let slip that need to scrutinize every last inch--mostly because I didn't really want to look at it any longer.
This is another project I pulled off the spindle onto my niddy-noddy and then portioned back out for a 3-ply yarn. I believe I originally intended 2-ply, but all that mindful and thin spinning would have yielded a true laceweight yarn, and I just finished knitting 800 yards of laceweight in a very complicated pattern and I don't want any more of it. So 3-ply yummy light-fingering weight yarn it is.
There are about 190 yards here in 60 grams. I think it will be a cowl, eventually. It's just the right amount and should be positively gorgeous.
Labels:
Spindle,
Spinning,
Stashdown 2011
Saturday, April 2, 2011
March Stashdown!
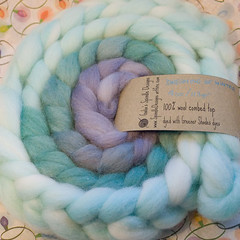
Here's the next project in my efforts to convert my stash from stash to finished object! This is four ounces of wool combed top dyed by Galia's Spindle Designs. This, surprisingly, is not wool I paid for, but rather a prize I won entering into the Phat Fiber Blog giveaways! I was so thrilled, because this wool is gorgeous. It also had a fascinating scent from whatever wash Galia uses.
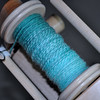
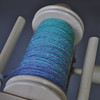
I love gradient dyed fiber and I really wanted to preserve the gradient. But with as long as the color shift was, I didn't really want to Navajo-ply the entire thing just for those three changes in color. I also noticed that there wasn't a long gradual change between each color and since I had an awful time trying to split the braid lengthwise I decided to try a different tactic. I broke the braid at each color change and started to spin. I ended up with three bobbins of three different colors of single.
Then the "hard" work began. I wound each of the three bobbins of single onto my niddy-noddy, keeping track of how much I wound. This gave me the full yardage of each single. Then I planned to make a slow-change yarn. The trick is to let each single run out over the length of the yarn.
Here's an example. I have 60 "yards" of my first color (=), 75 "yards" of my second color (-) and 60 yards of my third color (+). I know I'd like some solid color of each, and a length where the colors blend from one to the next, so I decide I'd like 5 yards of color-change. Since I want a three-ply yarn, I can divide my first color by 3 and then take 5 yards away from one strand, and add 5 yards to the last. The middle color just gets divided by three since it will already be offset by the first color, and then the last needs to bring everything back to the same length. So that's divided by three and has 5 yards difference in the first and last strand.
Here's a graphic to show it, below:
As you can see, one color runs out in each strand and then it all matches up again at the end.
Now, if this wasn't complicated enough, I figured I should make two matching skeins to use to make mittens. So, divide everything by two, first, and then do all the dividing-by-three and swapping extra yardage around and.. well. It worked. After winding and breaking and dividing and measuring and getting everything in the correct order on six different TP tubes and then back into plying balls, I was ready.
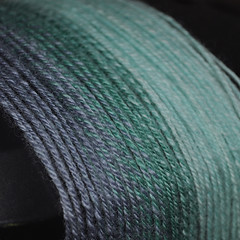
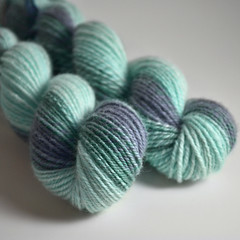
The yarn spun up very nicely. There is a lovely, slow change between each color as one ply runs out into the next color just as I planned. And the yardage between the two skeins is almost exactly matched. I did get off just a little bit and I'm still not sure how that happened, but it isn't going to stress me out at this point! And of course, part of the fun is figuring out how to photograph everything to show off how it all works!
And in the end, we have two really pretty skeins of yarn, ready to be mittens. And four less ounces of unspun fiber in my stash!
As for the rest of this month's stashdown...
I'd tell you all about these two projects, but they really deserve their own posts. Keep watching for more!
I love gradient dyed fiber and I really wanted to preserve the gradient. But with as long as the color shift was, I didn't really want to Navajo-ply the entire thing just for those three changes in color. I also noticed that there wasn't a long gradual change between each color and since I had an awful time trying to split the braid lengthwise I decided to try a different tactic. I broke the braid at each color change and started to spin. I ended up with three bobbins of three different colors of single.
Then the "hard" work began. I wound each of the three bobbins of single onto my niddy-noddy, keeping track of how much I wound. This gave me the full yardage of each single. Then I planned to make a slow-change yarn. The trick is to let each single run out over the length of the yarn.
Here's an example. I have 60 "yards" of my first color (=), 75 "yards" of my second color (-) and 60 yards of my third color (+). I know I'd like some solid color of each, and a length where the colors blend from one to the next, so I decide I'd like 5 yards of color-change. Since I want a three-ply yarn, I can divide my first color by 3 and then take 5 yards away from one strand, and add 5 yards to the last. The middle color just gets divided by three since it will already be offset by the first color, and then the last needs to bring everything back to the same length. So that's divided by three and has 5 yards difference in the first and last strand.
Here's a graphic to show it, below:
===============-----------------------+++++++++++++++++++++++++

====================-----------------------++++++++++++++++++++

=========================-----------------------+++++++++++++++
As you can see, one color runs out in each strand and then it all matches up again at the end.
Now, if this wasn't complicated enough, I figured I should make two matching skeins to use to make mittens. So, divide everything by two, first, and then do all the dividing-by-three and swapping extra yardage around and.. well. It worked. After winding and breaking and dividing and measuring and getting everything in the correct order on six different TP tubes and then back into plying balls, I was ready.
The yarn spun up very nicely. There is a lovely, slow change between each color as one ply runs out into the next color just as I planned. And the yardage between the two skeins is almost exactly matched. I did get off just a little bit and I'm still not sure how that happened, but it isn't going to stress me out at this point! And of course, part of the fun is figuring out how to photograph everything to show off how it all works!
And in the end, we have two really pretty skeins of yarn, ready to be mittens. And four less ounces of unspun fiber in my stash!
As for the rest of this month's stashdown...


I'd tell you all about these two projects, but they really deserve their own posts. Keep watching for more!
Labels:
Spinning,
Stashdown 2011,
Wheel
Subscribe to:
Comments (Atom)


