Tuesday, December 23, 2008

Rubbing Elbows

I get to go to a knitting group here in town and sometimes I get to see Joan Schrouder. It's so cool! She's so knowledgeable I'm almost intimidated.. except that she's so nice it's pretty hard to stay that way!

I've been working on The Knot for over a month now, and bringing my progress to Monday nights. After bringing in my cut version, and explaining it all to Joan, she immediately stated that I ought to write Janet Szabo (the original designer) to let her see what I'd done.

Me? Write Janet Szabo? I don't know what it is that makes contacting a published author so daunting. Maybe because there's a small part of me that would love to get published as well.. to end up famous and popular. Woo. I also know that published persons are just like the rest of us.. only.. published.. and therefor more well known. And more spammed. My brain debated this and decided that Janet would probably like getting a nice mail from someone not trying to sell her anything and really just saying "thank you" for a gorgeous design.

So after directing her to my blog in a short email, I went on to visit Janet's and.. it's funny! It's funny like I'm not funny. I'm too mathy, I think. At least now. Maybe a couple of years of blogging will loosen me up. (Here's hoping!)

Anyway, a couple of posts down I ran into a fun little MeMe, and had to jump in and do it myself.

Turns out.. I'm an Argyle Sweater.


You Are an Argyle Sweater


You are contemplative, brainy, and serious.
You don't take much lightly - life is too important for that.

You are a very determined person. You don't let anything stand in your way.
You think out your actions and act deliberately. You don't waste time, money, or resources.

Just Too Many Stitches

Sometimes you get a good idea. You run with it, work on it, love it, and notice that maybe, even though it's a good idea, it's not quite right. So you tinker, modify, adjust, (curse quietly), frog, rework, evaluate, (mutter under your breath)... Maybe now it's to the point you wanted in the beginning. But maybe it's not.

"The Knot" isn't there. I dragged it with me to my Monday Knitting Night, and got to show it to.. one person. It is Christmas week, after all. I should have anticipated it. But Monday night is so very important to me that I'd almost skip out on family to go. Okay, I DO skip out on family to go.. but it's my family and my husband can handle it one night a week!

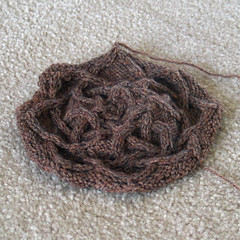
Spread out on the table, still on the blocking wires to hold it, it was all too clear that The Knot still wants to be more circular than square. There is more fabric at the center of each edge of the square than there ought to be in order to lay flat. I could still work around this. I could work more rows and expand at the corners until things are straight. I could do a few short-rows to compensate for the wider-at-the-middle-than-the-corners problem. I could also realize that after all this work I still have no idea how to put it in the back of my sweater... a back that I suddenly have realize is not square, itself.

Back when this was a design where "square" was the name of the game it was logical to stick a square in the middle of the back. As I searched through many, many cardigan patterns, I opted for raglan shaping at the arms and shoulders rather than Kate Gilbert's "innovative" shaping in the original "Cardigan for Arwen". Yet, despite these changes, in my head the back was still square. Last night I realized that.. um.. there are now ARMHOLES. Armholes! These won't be square! I'll have to figure out how to graft in The Knot not AND decrease for armholes!

I just can't do it. I could sit down and figure it out mathematically, but my intuition tells me it doesn't fit. I'm pretty logically minded, and most likely correct in my estimates. My raglan-shaping will "eat in" to the already knit square (that still doesn't lay flat). My ruler agrees.

I'm afraid I must give up on The Knot. I've found a lovely alternative. I had continued my search as The Knot became harder and harder to work. I happened across Continuous Cables. Lots of great material here! Lots of information on how to work, and design, circular, swirling, twisting cables knit on a background of plain old reverse-stockinette. There's even a pretty knot that I think would do well on the back of my sweater, as-is.

I still love The Knot. I'm thinking I'll get some pretty, paler wool that will show off its delicate curves and knit it once again to cover a pillow. That way I can enjoy it often and remember all the things it taught me. And maybe, in the future when I've learned a few more tricks of the trade, I'll figure out how to put it in the back of a very lovely cardigan that I designed, myself.

Sunday, December 21, 2008

Are you a Pusher?

Are you a pusher? Whenever I forget, or get in a hurry, all of a sudden I'm a terrible pusher. I gleefully shove the needle back through the stitches. As an English-style knitter, this lets me maintain better control of both needles as I "throw" the yarn around and greatly improves my speed. When I was learning on Clover bamboo needles, this wasn't a great tragedy. But last year a generous family member gifted me the Knit Picks Nickle-plated Options Circular Knitting Needle Set (complete with binder, before it was switched over to the clear pouch). I cannot express how much I LOVE these needles. This leads to the problem ...

I have a couple of Addi Turbos, and at the time I thought they were the bomb. I even have a really nifty little set by Plymouth Yarns (the Bamboo Sister Set). Interchangables.. how cool is that?!

These needles were more than adequate. Addis in particular have a beautifully smooth join and hat-knitting zipped by on them. The longer circulars served me well knitting my first baby blanket. Then a new kind of knitting came into my life... lace, and with it laceweight yarn.

I really wanted to produce some of that amazing lace that I saw in magazines and books. I picked out a project and bought a bunch of laceweight yarn, but before leaping off the deep end, I thought I'd make something small. Something easy. Something that wouldn't frighten me off of this very thin, very insubstantial yarn..
Airy Scarf
Enter the Airy Scarf. It looked simple enough. I pulled out appropriate Addis, my new lace-weight yarn, and went to town... and HATED IT. Ugh. The yarn was terrible to work with.. so hard to get it to move around the way I wanted it to. Something as simple as a knit-two-together was impossibly difficult. I forced myself to finish the scarf and in disgust wrote off lace knitting altogether.

Christmas arrived, and with it the deliciously pointy Options needles and all of a sudden, lace knitting seemed possible again. I worked out some swatches and everything just clicked! The narrow tips picked up that tiny yarn wonderfully and didn't just push it around the needles like my other sets. I jumped into the Sugarplum Shrug (Interweave Knits, Holiday Gifts 2007) with great abandon (once figuring out that it didn't actually call for lace-weight yarn! But that's another story).

But where does this all add up? Pushing. My Options may be fabulous for manipulating stitches.. no need to balk at k3tog or more. But the tip of my finger when I stop thinking and start knitting like crazy.. the poor thing suffers. Today I am on a self-enforced knitting break to allow a small split to heal before it becomes worse. It is absolutely no good to punch a hole in your own fingertip, and I refuse to bleed for my craft. At least, not on purpose!

So, to anyone that I showed the handy "trick" of pushing that needle back through the stitches, I'm sorry! Quit now and save your fingers, or enjoy the gentler points of many of the lovely needles out there. Just be careful, or you too might be taking a few breaks from your knitting.. to heal!

Monday, December 15, 2008

Knotted Up


Square Knot
Originally uploaded by Project Pictures
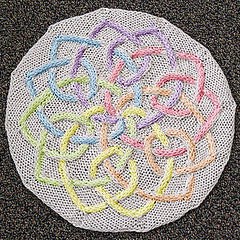
Here's the progress so far. I think the knot is a success, but I'm not entirely certain. I had to block it fairly hard and I'm not sure how that will do once added to the back of the cardigan.

The only problem is that I seem to be stalled. I don't want to pick back up the knitting and figure out more. Instead, I've detoured to other projects, and I'm looking ahead in my queue.

I think I just need to buckle down and get started again. Hopefully I can change this inertia to forward momentum!

Sunday, December 14, 2008

Quick Sweater Ornaments

Description:
Sweater Ornaments
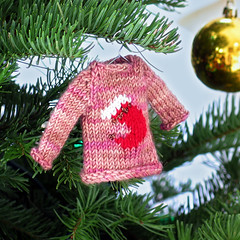
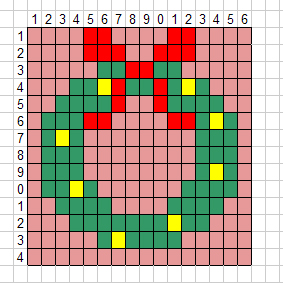
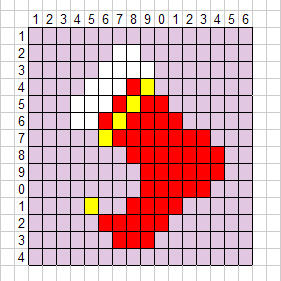
These quick ornaments are knit in the round from the bottom up. There is raglan shaping at the shoulders, but this could be ignored and the piece knit square. Charts are included for the designs on the front.

Materials:
Size 1 (2.25mm) DPNs
About 10 grams of fingering weight yarn (approximately 30 yards)
Colored scraps of yarn or embroidery floss
A small bit of wire or paper clips to twist into hangers

Gauge is not critical, but can be somewhere around 7-8 sts per inch.

Notations:
SSK - slip, slip, knit
k2tog - knit two together
BO - bind off (sugg. "lace bind off": start with one knit stitch then *knit 1, slip stitches back to right needle, k2tog * repeat until all stitches are bound off, cut and pull yarn through last stitch)

Stocking Sweater
Body:
Cable-cast on 32 stitches
Join in the round being careful not to twist the stitches
Purl one round
Work stockinette stitch until the piece measures 2 inches

(Work divides here, with 16 stitches for the front, and 16 stitches for the back)
Front and Back chest:
Use the following instructions for front, and then repeat for back stitches:
Row 1: slip first stitch, knit to end
Row 2: slip first stitch, purl to end
Row 3: slip first stitch, SSK, knit 10, k2tog, k1
Row 4: slip first stitch, purl to end
Repeat rows 1-4 one more time
Next row (row 9), BO all stitches (or purl 3, BO 10, purl 3)

Seam (or graft) 3 stitches on each side for the shoulder.

Both sleeves:
Pick up and knit 10 stitches around the armscye, starting at the armpit.
Short row a "shoulder cap" for shaping.
Starting at the armpit:
Row 1: Knit 6 stitches, turn
Row 2: slip 1, purl 1, turn
Row 3: slip 1, knit 2, turn
Row 4: slip 1, purl 3, turn
Row 5: slip 1, knit 4, turn
Row 6: slip 1, purl 5, turn
Row 7: slip 1, knit 6, turn
Row 8: slip 1, purl 7, turn
Row 9: slip 1, knit 8
You are now back at the armpit.
Knit all 10 stitches in the round for 1.5 inches or to desired length.
BO all stitches.

Weave in ends.

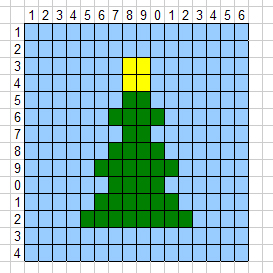
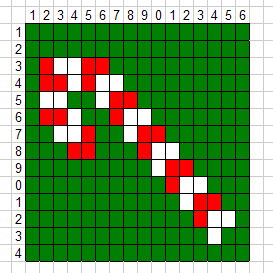
Use following charts and duplicate stitch to add decoration.
Tree
(Star and "ornaments" can be added with embroidery thread)

Candy Cane

Wreath

Stocking

Happy FO's


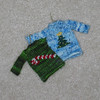
Sweater Ornaments
Originally uploaded by Project Pictures
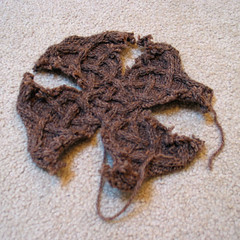
I took a break from the sweater. I've knit (and frogged) the knot for the back several times now. After pinning the most recent version out on blocking wires while I tried to decide if it's what I wanted, or not, I ended up taking a several day break from any knitting at all.

This is pretty major for me. I like to be working on something. Even better, I like to be completing something new to share and enjoy. I decided I had to finish something.. anything.. and FAST.

Digging through my stash yielded just too many nuggets of left over sock yarn. I figured some Christmas ornaments were in order, especially since my good friend mailed me a pattern for a sweater-ornament out of sock yarn. Ironically, I didn't even look at the pattern. I just cast on stitches and went for it.

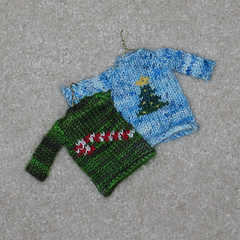
These are made bottom-up. I decreased just a little for a raglan-look. There's not much done for the neck (IE: nothing), but it's not like they're actually going to go ON anything except a tree or wall. I considered intarsia/fair isle for decoration, but ended up adding the embellishments after the fact with duplicate stitch, which was much easier.

Overdye ornament
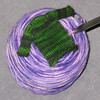
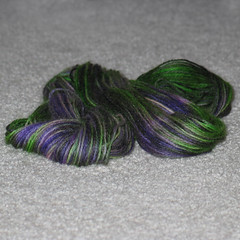
It is also an experiment in over-dying. The green sweater started out its life purple. Unfortunately I just couldn't love it. I loved the purple in the skein. I haven't really liked it for anything knit up. After glaring at it for quite a while, I ripped out the candy-cane and tossed the sweater in a cup of water with a tiny bit of Wilton's green food coloring and a glug of white vinegar. This whole thing went in my microwave until it boiled and then sat to cool. What came out was GORGEOUS green. The candy-cane, reworked, just pops on the beautiful color. You can check out the original, and overdyed colors.

Overdyed Yarn
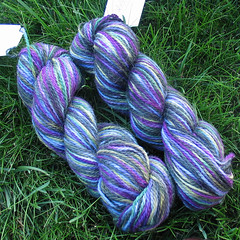
I then went on to skein up about 25 grams more of the yarn and tried it again. This time the color didn't penetrate, but I think I rather like the new skein. It makes me think of Spring crocus, or violets, and I may make some baby socks with it!

Sunday, December 7, 2008

Like steeking ... but not.


Cut Knot
Originally uploaded by Project Pictures
I got out my scissors. It wasn't easy. I've labored over this knot, and while it may not have been true love with the project so far, it still was a lot of work. It's yarn... I could unravel it and use it for something else. I could test knit a lot of other projects with this same yarn!

But.. I couldn't stand the thought of knitting it AGAIN just to test. Another version that might or might not work. My sewing scissors are very sharp and even sound dangerous (shkk, shkk, shkk). I held them poised over the even stitches. Snip! Snip! Four times I cut through my knitting and in the end, I had a piece that was flat and even. Stretched evenly and carefully there wasn't even much of a gap.

And then a new idea revealed itself... because now I had a new pattern. I could, if I wanted, make this into the knot it was before, expanded at the four corners. Or, I could leave a gap where I'd cut the crossing. I could turn this pretty knot into a lovely and elegant equal-armed cross! It would be even easier than extending the arms across my wider gap.

Oh, the dilemma!

Saturday, December 6, 2008

Test knitting


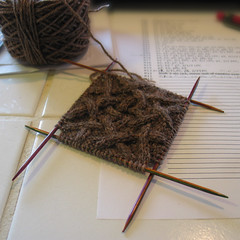
6-point knot
Originally uploaded by Project Pictures
Some days you can't see where your ideas are going to take you, or how long it's going to take to get there. When I originally decided to make a sweater for myself, I figured I'd have it done in time to wear for Christmas.

Over two weeks ago, I cast on and knit swatches to make "A Cardigan for Arwen" by Kate Gilbert (Interweave Knits, Winter 2006). I started to work the back and very quickly came to the conclusion that a big, plain, square back was going to be very boring to knit. It really needed something to match the beautiful cabling that graces the front. As I purled a row for turning the hem under, I centered the same cabling that goes up the front so that it would run right up my spine. Unfortunately, after a few repeats I could see my gauge wasn't quite what I'd planned it to be--probably because that cable was pulling things in quite a bit.

I began tossing different ideas around. I considered mitering that lovely cable and doing a square of it. But as long as I was going that far, why not find something even more striking, or design a knot and center it in the back of the sweater? I could short-row something much like the washcloths I do regularly, but that would create a cable that is longer on the outer edge than the inner one. Maybe someone had something out there already that I could just incorporate. Ravelry to the rescue!

My online search yielded the "Hilton of Cadbol" Flower Pillow by Janet Sazbo ("Twists and Turns", Winter 2003). The challenge here was how to adapt a circular motif to fit a square panel. I could knit the panel with a circular hole, or make the motif square. That shouldn't be too hard, right? Subtract two repeats.. maybe add in a few stitches. It'll square right up! Right.

4-point knot
To get it straight in my head, I borrowed a project picture and edited it so that I only had four repeats of the motif. It still seemed work-able. But when I started knitting the pattern, I just couldn't figure out how to add or subtract stitches to give myself the shape I wanted.
First try
I cast on a number more than my needed stitches and decreased at the four corners for a few rows to start off the shape and was off and running. By the time I ran out of yarn, I knew I was in trouble.. the project was already buckling into a volcanic shape. Even stretched hard, it didn't look like it was going to lay out flat even after blocking.

Second try
I took a few pictures to remind myself where I'd gone wrong, and started over again. This time I worked the pattern from the center out, revising things as I went along. That sure sounds easy, doesn't it? I spent almost an entire week trying to chart, rechart, reverse, sketch out, and generally re-work the pattern to knit from the center out. I hoped that this would give me more freedom to add stitches as I went along. My husband started to look concerned with the amount of effort I was putting into it. My friends weren't so delicate. (I distinctly heard "crazy", and "OCD" tossed around!)

I wish I could say what exactly clicked in the end, but I don't have a clue. Suddenly I had about ten lines of workable pattern and I started knitting. I also dug out a yarn I liked quite a bit more than the acrylic/wool blend of my first go-around and at least was able to enjoy the knitting a bit more. It's really hard to linger over a difficult problem when you don't particularly want to touch the yarn.

I still couldn't puzzle out where to increase stitch counts. As a stop-gap I went up two needle sizes about half-way through with the hope that shifting my gauge larger would deal with the buckling.

Finished 4-point
No such luck! I have a lumpy, bumpy knot. It is quite pretty and I'm pleased with it so far, but it sure isn't going to work as the back of a sweater.

At least I can finally see where to insert stitches! It's a relief to feel like you're headed in the right direction. I was going to save this and make it into a little pillow for my daughter's dolls, but now I'm considering taking scissors to it along the lines where I want to add stitches and see if that will let it lay flat. It makes me think of cutting slices of bologna so it won't curl up when fried (for pretty much exactly the same reasons).

Only.. now I'm hungry.

Monday, November 24, 2008

Lumpy Bumpy Mitts


Lumpy Bumpy Mitts
Originally uploaded by Project Pictures
I've been working my way through my stash and trying to finish off partial balls and bits and pieces. It feels to me like a "Spring Cleaning" in reverse. My "Winter Destash" has yielded a lot of lovely yarns. One of them was a pretty green thick-and-thin yarn by Farmhouse called Lumpy Bumpy (by Charlene).. I used this in a very pretty hat, stranded with Misti Alpaca Chunky, but had half of it left over with no idea how to use it.

It's a gorgeous yarn, and beautifully soft. The green is wonderfully saturated. I still wasn't sure what to do with it, but set out to knit it and see what happened. I thought maybe it would turn into a scarf for my daughter, but as I cast on I had the idea for fingerless mitts. I knit the yarn into a square and seamed the cast-on and cast-off edges together, leaving a gap for the thumb. With the last few yards I added a thumb. I had exactly the right amount of yarn with barely a yard left over!

Lumpy Bumpy Mitts
Hand
Cast on 25 stitches.
Knit 37 rows, slipping the first stitch every row.
Bind off.
Join cast on and cast off edges for about two inches. Leave a two-to-three inch opening for the thumb and join the rest of the seam.

Thumb (optional)
Pick up and knit twenty stitches around the opening, starting from, and ending at, the top (finger end) of the mitt. Turn work to knit back the other direction. You will be working these stitches back-and-forth around the thumb opening. The decreases will fall at the base (wrist side) of the thumb opening.
Knit 8 sts, k2tog, k2tog, knit 8. Turn work.
Knit 7 sts, k2tog, k2tog, knit 7. Turn work.
Knit 6 sts, k2tog, k2tog, knit 6. Turn work.
Knit 5 sts, k2tog, k2tog, k5. Turn.
Knit 4 sts, k2tog, k2tog, k4. Turn.
Knit 3 sts, k2tog, k2tog, k3. Turn.
Bind off stitches with kitchener stitch.

Weave in ends, and complete your second mitt.

Friday, November 21, 2008

Short Row Love


Violeta - thumb mod
Originally uploaded by Project Pictures
Some days, you think a project is done, and then when you come back later it just isn't perfect. Does that mean you shouldn't change it? It is, after all, "done".

In the case of my Violeta gloves, it was love, but not perfection. I had never made fingerless gloves before, but the more I wore them, the more the opening around the thumb irritated me. It stretched. It gaped. It felt incomplete.

I still had a small nugget of cashmere yarn left. I wasn't sure what to do with it, but I'm not one to throw away even the smallest amount of yarn if I think I can turn it into something new. I spent some time looking at the thumb-opening, and considering what to do with it. I tried picking up stitches and knitting myself a thumb straight off.. but it stuck out and was awkward. Then it occurred to me.. short rows were the answer!

I picked up stitches around the opening and worked short rows starting at the base of the thumb, including one more stitch each pass. This made a lovely afterthought thumb.

Violeta Afterthought Thumb
Pick up and knit 24 stitches around the thumb hole (or an even number of stitches to match your opening) such that the start of your round is the base of the thumb (wrist side)
Knit one round
Knit two stitches, turn work
Slip first stitch and purl 3, turn work
Slip first stitch and knit 4, turn work
Slip first stitch and purl 5, turn work
Slip first stitch and knit 6, turn work....
... continue in this pattern, working one stitch past the slipped stitch each row.
Work until two unslipped stitches remain at the "top" of the thumb.
Knit all stitches until you reach the start of the round.
Knit three more rounds
Purl one round
Bind off purlwise.

Friday, November 14, 2008

Progressive Mittens

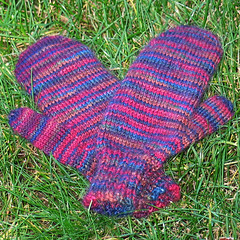
Here are the "recipes" for my two sets of mittens. They were developed using "Progressive Gloves" and "Thumb Gussets" by Pam Allen (IK Winter 2003). They both have the "Wide Gusset", and some extra shaping at the fingertips.

Progressive Mittens

Materials:
Size 1 (2.25mm) needles
Mountain Colors Hand-Painted Yarns, "Bearfoot" merino/mohair blend (about 30g)

Size
1-2 years (3-4 years)
Stitch count is the same for both mittens. The larger pair is longer, not wider. This is because I found it much easier to get a one-year-old's hand and thumb into a bit looser mitten. The ribbing at the wrist still keeps it snug.

Cast on
Cast on 44 sts and join to work in the round
Optional: Purl one round, Knit one round

Cuff
Knit 15 (20) rounds in K2, P2 rib

Wide Gusset
Knit 2 (4) rounds in stockinette stitch
On the last round of st st, knit 20, pm, knit 4, pm, knit 20
Wide gusset increases two stitches every three rounds
* Increase round: Knit to marker, inc one stitch (lift bar between two stitches and knit into the back), knit to next marker, inc one stitch, knit to end
Knit 2 rounds
** Repeat from * for 14 (15) total rows (14 gusset stitches)
Next round: knit to marker, move stitches between markers to scrap yarn and cast on 4 stitches in the gap, knit to end.

Hand
Knit 14 (25) rows
Decrease pinky side (k2tog, knit to last 2 stitches in round, ssk)
Knit one round
Decrease pinky side
Knit one round
Decrease pinky and thumb (k2tog, knit 16 sts, ssk, k2tog, knit 16 sts, ssk)
Knit one round
Decrease pinky and thumb
Knit one round
Decrease pinky and thumb for three rounds
Bind off with Kitchener stitch
Note: I found the transition from decreases to Kitchener to be somewhat abrupt. To try and smooth this, I treated the first two and last two stitches as one, binding them off together.

Thumb
Put 14 gusset stitches back on working needles and pick-up and knit the 4 cast-on stitches. (18 sts)
Work in the round for 12 (16) rounds.
Decrease with *k2tog, k1* (12 sts)
Decrease *k2tog* (6 sts)
Break yarn and thread through remaining stitches twice. Pull tight.

Weave in all loose ends to finish.

Thursday, November 13, 2008

More Mittens


More Mittens
Originally uploaded by Project Pictures
Sometimes you need a quick project. I needed a filler in between the Grey Gansey, and my next project (the yarn for it was on order at the time). Since my DD has grown out of her old mittens, I opted to make a new pair.

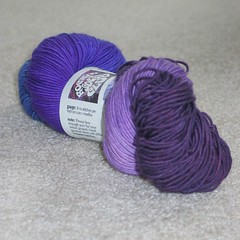
My first try started with Pagewood Farms Denali hand-dyed yarn in the "Grape Juice" colorway. This yarn called to me in the store with its many shades of purple. Strangely enough, it is one of the few yarns I like much better in the skein than knit up. It doesn't have a particularly nice feel to it, despite the fact that it is merino wool. The yarn doesn't have much bounce, as I've gotten accustomed to using with Socks That Rock. And I get very seriously tired of looking at purple, purple, purple while I'm knitting.

I also ran into a small, but amusing problem. I didn't take good notes when I wrote down the pattern for these mittens the first time. My gusset instructions left me thinking to increase two stitches every round for 14 rounds. This gives you a gusset that is half the size of the entire mitten! I frogged back and tried again, increasing every other round. That seemed almost right and I finished the entire mitten, going back for the thumb and scratched my head. There were still too many thumb stitches. I decreased early on and went with it. Finally, it dawned on me that this particular gusset requires you to increase two stitches every THIRD round. Blast.

Looking at that slightly kludged single mitten, I decided it just wouldn't do. Between the futzing with the pattern, and the color, I really didn't like it. Rather than subject myself to working more with the too-purple yarn, I dug into my bag of Bearfoot mill ends and pulled out two mini-skeins that I thought were the same colorway. Each was 27 grams... surely that would be enough for two mittens. With luck I might even get two mittens out of one of them!

I came very close! These two mittens took 30 grams of Mountain Colors Bearfoot yarn (merino/mohair blend) in the "Pheasant" colorway. Or I hope it's Pheasant. I have no idea with most of my mill ends!

In creating the mitten pattern, I used Interweave Knits' "Progressive Gloves" article. I was lucky enough to download this article back when it was available on the Knitting Daily website. It might still be there, somewhere, but I have the worst time finding things. I have the PDF for both it, and for the in-depth gussets article and they have been extremely useful. I designed my first pair of gloves using these articles, and two pair of mittens. "Progressive Gloves" was originally published in Interweave Knits, Winter 2003, and is very worth finding in your library to read. It gives you the underlying math to calculate your own gloves or mittens out of any gauge of yarn. Add any lace you like to the cuff and back of the hand, and you instantly have a gorgeous glove of your own design!

Sunday, November 9, 2008

Grey Gansey


Grey Gansey
Originally uploaded by Project Pictures
I must say that I love knitting on Monday nights. It's great for my ego. A number of the women there seem very surprised with "how much I get done" in the week. At the same time, I'm just amazed at how many projects I see them come in with! I suppose I look at it from the perspective of knowing just how much knitting time I missed, rather than how much I managed to squeak in (which is usually quite a bit).

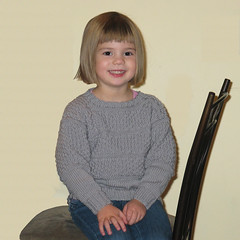
For instance, this afternoon I finished up another knit gift for my family. This one will move on to my nephew and hopefully be good for two years. I was aiming for a 2/3 size, but as you can see on my daughter, I think I hit closer to 3T (and maybe 3/4). At any rate the cuffs can be rolled up and a chunky look is going to be quite cute with this particular design.


Despite of the fact that I don't understand why you want to bother with minimal shaping on the sleeves, I did end up doing some. In the end I put six short rows in, each one short 8 stitches of the previous row. That makes the top of the sleeve just over one inch longer than the bottom. I'm not sure it makes a huge difference, but it made me feel smart and creative--so that's good enough! It also matches the sweatshirt I was using as my template.

I'm not certain this sweater is actually a gansey. I had a hard time understanding if it was the shape, or the cabling that made a gansey (or perhaps both). No cables here--just double-moss stitch. But is has a very attractive, blocky shape that seems to match all the ganseys I was able to find in my research. I still like the name better this way. It's much more elegant than "grey sweater".

I need to find a couple of "made with love" tags that I can put into things I am making for gifts now. This one needs one, and I need to mail one to my mother so she can (please, Mom?) tack it into the sweater I left there to be given at Christmas time. I'm also thinking of including a small bottle of Eucalan or Kookaburra wash. With as lovely and as special as these gifts are, I'd like to see them last a long time.

And even if they don't, I really had a lot of fun making them!

Wednesday, November 5, 2008

Toss the pattern, keep the design


Grey Sweater
Originally uploaded by Project Pictures
I've decided to make knit gifts this year for some of my family. I already have two done and left behind with appropriate persons to had them over at the proper times. Here's one more in the works.

My sweet niece will be receiving a beautiful Debbie Bliss cardigan. I figured her older brother needed something just as handsome. I had plenty of Debbie Bliss Rialto in my stash from when our local Ben Franklin Crafts decided to close out that particular type of yarn. My nephew has great blonde hair and bright blue eyes, much like I did when I was younger. So I'm certain this soft grey is going to look smashing on him!

I picked out a DROPS design (s7-5 Sweater in Alaska) on Ravelry. The pattern is written for a heavier weight yarn than the Rialto, but it also only goes down to size 3/4. As my nephew is 2.5 years old, I figured I could work out the differences in gauge to give me a smaller size. I started off following the 3/4 size pattern, casting on in the round and working up to where the sweater split to create the armscyes. Around that point I decided that back-calculating lengths and gauges was much too much of a bother. I rummaged through our old clothes and pulled out a much-loved sweatshirt that had the same basic shape as my pattern.

The pattern got tossed back in the basket. Instead, every few rows I lay out what I've done against the sweater. It's working out quite well. The other night I did the front, binding of stitches to match the sweatshirt's neckline. Today I was able to work up the back and do the same. I sewed the shoulder seams with a standard mattress stitch, and then picked up and knit all around the neck. I did about one inch of a 2x2 rib on much smaller needles and I think it's come out pretty well. I was slightly tempted to pull it out and do it on one size smaller yet.

Then I decided to tempt my daughter into trying it on. She's a year older than her cousin.. so clearly I'm still a bit big. Then again the model in DROPS shows the shoulder seams extending half-way down his upper arms, so maybe not!

I've spent the rest of the day puzzling over the pattern instructions for the sleeves. I think I've got it all figured out but for one thing. For some reason there is shoulder cap shaping... but it's only two rows. In the pattern's gauge, that's all of 1/2 cm of shoulder shaping. I'm thinking about ignoring it altogether. My yarn stretches 1/2 cm if you look at it. What's the point of those two silly short rows?

If you know, feel free to enlighten me. It'll take a while to get that far up the arm, anyway!

Wednesday, October 29, 2008

Little Boy Browns


Little Boy Browns
Originally uploaded by Project Pictures
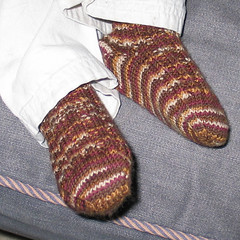
Vacation knitting is a ton of fun. This past week I decided to get one pair of my children's socks done. So I brought along the leftover brown yarn (Shibui Sock in Earth, leftover from the Icosa Ball) I had earmarked for my son, and some size 2 needles.

The beauty of simple socks is you don't really even need a pattern once you have the hang of them. The wonderful thing about children's socks is that they're so small they take almost no time at all to complete. I kept a pair of DS's store-bought socks on the side to give me a feel for a good size, and just improvised.

These socks start with 16 stitches in Judy's Magic Cast-On. I increased on either side of the instep and sole (using Cat Bordhi's LLI and RLI) every-other row until I had 48 stitches. Then I worked the instep in a 2x2 rib, and the sole in stockinette. I did extend one purl stitch on either side of the sole to make the numbers work out right and center the ribbing. The foot is 20 rows long to the heel.

The heel is short rows, starting with all of the sole stitches and decreasing to eight stitches (between wraps) before increasing back to the full width. I didn't bother to pull up the wraps and knit them. After all, these are going on a 1.5-year-old boy; he doesn't care about the wraps! The cuff is 2x2 ribbing all the way around, and is 24 rows long. Bind-off was in pattern: *work one, pass previous stitch over* repeat to end.

I'm moderately happy with the socks. I think I could probably reduce them to 32 stitches and be much happier. At first glance they seem to fit just fine. But there is little (if any) negative ease, and unless stuffed into shoes they slide right off his little feet. In fact, he seems to like that and pulls them off at the first opportunity with much laughing.

I think after I get a bunch of other projects done, I may try these again with leftover green (Shibui Sock, again) yarn. It was a lot of fun, tho, to whip out a pair of socks without even having to think about it, and do it so very fast.

Tuesday, October 28, 2008

The Fourth Time is the Charm?

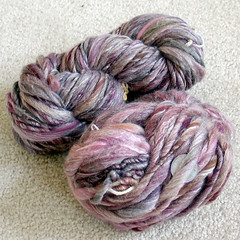
A couple of weeks ago I had the idea that I wanted to use the herringbone stitch in a hat. I really love the way it shows off hand-dyed yarn. It was wanting to make this hat that drove me to run out to Dyelots and get roving to spin my own bulky singles just for this hat! After that, I decided that I needed to engineer the stitch to be done in the round.

I got out some old yarn and started working on a swatch just to see how the stitch went together. I used the pattern from My So Called Scarf and went to it. A couple of rows and I figured out a trick to working the stitch in the round. I also worked out an 'easier' way to do the first row.

Start with an even number of stitches
Row 1: K1, *s1, k1, yo, psso both knit and yo* - repeat until there is one stitch left, K1

The second row gets interesting.
Row 2: *yo, k1, slip both stitches back to the left needle, pull third stitch over yo and knit stitch, slip two stitches to right needle* repeat around

It creates a beautiful pattern... that has absolutely no give along its length. Having worked from the top down, I had the crown of my hat done and started working this pattern, only to find I couldn't stand how stiff the cloth came out. Hat #1 hit the frog pond.

I immediately went to Ravelry and browsed patterns for bulky and superbulky hats and found Urchin, from Knitty (isn't it pretty?). Here was something just made for this yarn, right? I cast on and worked my way through two sections of the pattern. Texturally it was a good fit, but boy did it not look nice with my yarn. The handspun merino/bamboo blend has lovely silvery streaks running through it because the bamboo does not take the acid dye and remains white. Garter stitch reduces that to a muddy sheen. It's pretty, but it's not drop-dead gorgeous the way that stockinette is with this particular yarn.


Hannah - back
Originally uploaded by Project Pictures
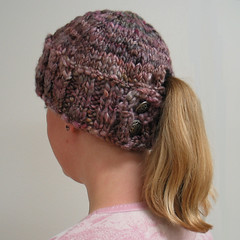
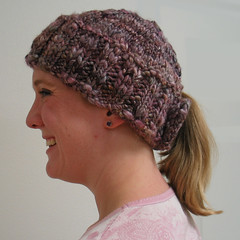
Back to Ravelry again! For a long time I have had Hannah from MagKnits in my saved patterns. It's for bulky yarn, and a super-cute hat. I decided to give it a try.

Our first problem here is that Hannah calls for bulky yarn and my handspun ... well, to say it nicely it transcends "bulky". My second skein is much closer in weight to a milled bulky yarn, but I'm saving that for some mitts. I sat down with the pattern, my handy Molskeine notebook, and math on the brain. Then I went for it. Even as I knit, I decided that parts of it were still going to be too big. I made the buttonholes smaller (only one YO instead of two), and dropped out rows left and right. The beauty of very-bulky projects is they knit up SO FAST!! Two hours later and I had a "finished" hat again. I tried it on and it was incredibly cute! Plus my yarn had made a rather interesting color-spiral at the crown.

Unfortunately it was just a shade too big. Oh, it looked nice. It looked like it fit. But if I bent over, this pretty "little" hat would tumble right off my head. I tried snugging up the button-band. I shoved it in my suitcase for the trip home and considered for several hours if a little bit of elastic woven in would do the trick.

Instead, when I got home, I carefully picked out the woven-in-end at the crown and pulled the whole hat apart once more.

Yesterday I cast on ten stitches less, figured out how to make the first row of decreases bring me back in line with my pattern for the crown, and whipped this baby out one last time. It worked! The hat fits beautifully. It looks lovely, with a wonderful match between yarn and pattern (and my clothes). And it is amazingly soft and warm.

And I made it, yarn and all!

Tuesday, October 14, 2008

A Momentary Dye-gression


Dyelots Roving
Originally uploaded by Project Pictures
For quite a while I have admired the "My So-Called Scarf" pattern on Ravelry, especially when knit with particular Malabrigo colorways. The herringbone stitch pattern looks lovely and warm, sturdy without being too heavy or overpowering.

After making Versatility with Manos del Uruguay, I decided I wanted to do a hat with the same herringbone stitch in a lush, chunky single. After listening to the Y Knit podcast on spinning, I gave in to the desire to make the yarn myself!

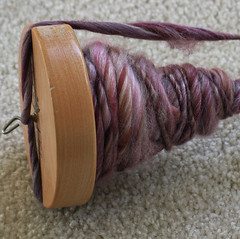
I had the good fortune (and wonderful, understanding DH to enable me) to take a class in hand-spinning with a drop-spindle at one of our two great LYSs. Over the course of four weeks, we started with raw fleece and ended up with yarn. We fluffed locks, carded rolags, spun, plyed and finally washed out all the nasty yuck and came up with .. well. It was yarn. I knit a 1x1 square out of it and stuffed it in my cabinet. But it did give a very firm grounding in the art and craft of spinning yarn with a drop-spindle. I just wasn't in love with the fleece-processing.

It took me these last few years to realize that I could skip that part. You can drop spin from all that delicious, gorgeous roving that is in so many places around here. A local dyer provided me with 8 oz of lovely roving made of merino wool blended with bamboo fiber. Because it is acid-dyed, the merino wool took up the color beautifully, but the bamboo (being cellulose and not protein fiber) remains untouched and silvery white. She also gave me a quick overview of how to deal with the roving for spinning. Easy!

I took it home with the promise to myself of doing the spinning .. sometime later. That didn't last. I had to play with it, and then I had to spin the whole thing!

I was going for a bulky single, so I spun what felt thick. Now that I look at it.. it isn't just bulky, it is "holy-cow-that's-some-thick-yarn" extra chunky. It's still gorgeous and soft. There are about 40 yards in that effort.

The second half went even better as I worked more consciously on drafting an appropriate amount of fiber. I ended up with 75 yards of something much closer to bulky-weight. Both halves are luscious. I'll probably use the thicker weight in the brim of the hat and do the crown in the (slightly) thinner yarn.

I do need to finish a couple of things first, but I've already re-engineered the herringbone stitch to work in the round. The idea is continuing to percolate while I finish up my Violeta mitts and Gumdrop socks. I can't wait to get started!

Sunday, September 28, 2008

Yarn Swaps and Gift Angels


Angel Gift
Originally uploaded by Project Pictures
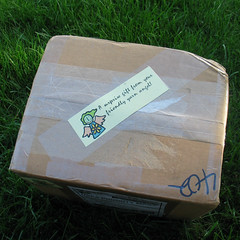
Almost a year ago now I joined a Swap Group on Ravelry for giggles. We did a "Secret Santa" swap then and it was a ton of fun. Then Megknitficent came up with a fun idea of a "Random Acts" swap. I'll have to admit that while I thought it to be an awesome idea, at the same time felt she was just a WEE bit crazy--because the proposed swap was going to be an insane amount of work. People joined in and Megknitficent matched people up over SIX MONTHS of time. You never knew when your package was going to come in the mail. My send-date was the final month (July).

Unfortunately, at the end of July, no package had arrived at my doorstep. How sad! Still, I'd had a great time making up my own gift and sending it off. Hopefully its recipient liked it! One other person in the swap and I had been exchanging some notes, and we contacted Megknitficent to let her know that two packages had gone astray at some point. Knowing how the economy was, I also told Megknitficent to call my side of the whole thing closed. I was happy enough having sent out my gift and ready to stop stalking the mailbox.

Still, the call went out for "Yarn Angels", people willing to gift twice with nothing in return. At the end of August I shelved the whole thing in my back brain, deciding just to forget about it and watch for the next swap that caught my eye. Probably Christmas--I love Secret Santa swaps!

I must digress here for a small explanation... our mail is delivered at the curb in two big boxes on posts. One has seven smaller divisions (plus the eighth, an outgoing mail drop) where most mail arrives. You have the key to your own little box. It doesn't fit much so if you get something bigger, then another key appears in your small box which you use to open the box-next-door, a much bigger package-delivery box. Imagine my surprise when, on Saturday, I went out to get the mail, and there was a box-key in with all the junk mail!
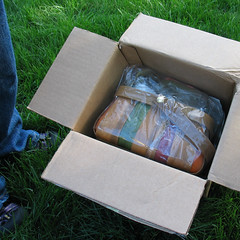
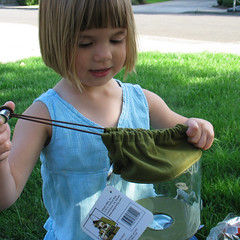
When I opened the larger mailbox, I found this package waiting inside. Whee! My DH laughed at me and I immediately ran for the camera, and got a small helper to assist me in the unpacking.
We documented every step of the process, with DD helping me remove the items and exclaiming over each one. She is very excited about making Halloween cookies AS SOON AS POSSIBLE. I'm not sure I can properly stress her excitement over the whole idea. Cookies. For Halloween. That you DECORATE... it's whole worlds of "wow"! (It helps that she came across my heart-cookie-cutter just a couple of days ago and was all about making those cookies, too. The prospect of making cookies right now just has her bouncing off the walls.)

For me there was enjoyment in ever step of opening this package. The entirety was contained in the box.. and in that box a lovely basket of bent strips of wood, some colored and some stained brown. You can NEVER have too many baskets.
Inside the basket were two cookie cutters (as you have probably already gleaned from the comments above) one in the shape of a ghost, and the other a pumpkin, as well as a jar of Halloween sprinkles... but wait. There is still more!

A project bag! A real one.. not some basket I've re-purposed to the task. It's wonderfully constructed with a green top and bottom and clear sides. Sturdy brown elastic pulls the top closed smoothly. And to use with that bag? Beautiful KnitPicks Harmony DPNs (size 2s)
and two skeins of Imagination (merino/alpaca/nylon) sock yarn in the Wicked Witch colorway.. which I ADORE having seen it in person.I spent much time petting my pretty yarn.

All of this came from Drdesigns... the other person that was left out in the swap! You have a heart of gold and deserve something surprising and good to come your way.

Wednesday, September 24, 2008

Versatility with Beads


Versatility with Beads
Originally uploaded by Project Pictures
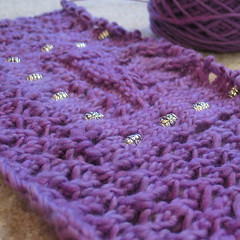
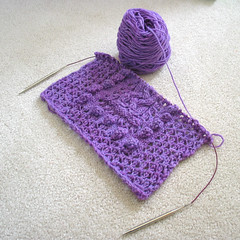
Success, I think! The bobbles are gone and I'm pretty much back to where I was before giving up on them.

I'm really pleased with the beads. They are a nice visual element to take the place of the textural element the bobbles provided. Since I did not completely frog the project, I couldn't string the beads on the yarn. But then again, I never planned to do so.

One of the wonderful people in my knitting group did a gorgeous shawl and shared a small trick with us for placing the beads. Rather than pre-string them on the yarn and fiddle with them for the whole project, she found a very (VERY) small crochet hook. She explained that whenever you got to a stitch that needed a bead, simply drop it off the needles and pull the whole thing through the bead with the crochet hook. Then place it back on the needles and continue knitting. This has an added advantage of centering up the bead on both strands of the stitch, rather than on one side. If you can't find a crochet hook small enough, a thin strand of wire folded in half can also work to pull the yarn through the bead.

It's a very handy trick and saves the time and energy of struggling with all those pre-strung beads on your yarn.

Tuesday, September 23, 2008

Versatility


Versatility
Originally uploaded by Project Pictures
I made good progress on Versatility. It helps that I'm using 10.5 needles and bulky yarn (some say aran, some say bulky--but my gauge is on track and that's good enough). The Manos del Uruguay yarn is gorgeous, and has the bonus of having been purchased on sale. I was on a felted hat kick for a while and thought I'd keep going, but fell off that wagon for a while and this yarn languished in the stash.

Now it has new life, but I have to tell you the bobbles are just not working for me. I don't like knitting them (even though I've taught myself how to purl backwards so I don't need to turn my work as I go). I don't really like how they look on the project in person, although I do like them in the finished project pictures. I've decided on a mod and today I frogged back to the row just before the bobbles.

Instead of bobbles, my project will have beads where the bobbles should have been. I hit up three stores hoping to find some glass pony-beads. I have plastic ones that are lovely, but they're.. well.. they're plastic. They have that little ridge from being molded and despite being pretty in color, they aren't nice to touch and I want good "feel" to go along with this yarn. I have one (just one) glass pony bead and I have no idea where it came from but today I set out to find more in the hopes they would complete this project.

First up on the docket this afternoon was Azillion Beads. I love the name and they do have very pretty beads, but they are all bored to accept jewelry wire and not much else. Next up was Ben Franklin Crafts. BF has been good to me. They have nice sales and a shockingly nice yarn department. They also have an extensive bead area, but again nothing much but jewelry beads (but wow, what a selection of those!). I did find some clear beads very similar to pony beads, but they just didn't speak to me.

Last on the list was Michael's. Michael's has recently moved across town (and actually into the neighboring town) into a much bigger and newer store. It's nice to walk in to lots of space and light. Some have complained that with that increase space and light there should be more YARN. And actually more of anything other than scrap-booking supplies. Still, there's quite a nice craft selection and yes.. pony beads. The same plastic ones I already had. So sad. I wandered the aisles in desolation, cheering on my two children who had behaved like the troopers they are, toddling along with crazy mommy looking for beads.

Versatility Beads
Originally uploaded by Project Pictures
But there, on the end-cap, something sparkled. What was this?? Pretty and... was the hole big enough? My goodness! I'd found the perfect bead. It was much like a pony bead, and yet nothing like it. They are metal and have good heft, a pretty design, and nice touchable smooth edges. Seventeen in a pack.. five packs available for (calculating in my head 20-rounded-up-from-17 times 5 packages is 100 minus 3-the-difference-between-20-and-17 times 5 packages is 15) a total of 85 beads. But didn't the designer say there were 106 bobbles in the pattern? Surely that can't be right.

I bought them all anyway and came home to count up on the chart. She surely did say 106 bobbles in a conversation, but I count (drum-roll please!) 84 total!!

So tonight, I will be putting in a row of these beads and hoping they will be as pretty in the project as I think they might be. Cross your fingers with me!

Monday, September 22, 2008

Multiple Projects

It is unusual for me to allow myself more than one project on the needles at a time. I have a fear of the resting project going into permanent hibernation. I also have a fear that someone else in the house will find the "resting" project, make off with the needles, and tangle (or chew) the yarn... whee!

The Ravelympics was a departure from my usual conservatism, putting my Christmas knitting in the background (probably a safe enough move, since there was plenty of motivation to pick it back up again) in favor of frantic knitting for two weeks. Even then, I finished one project before winding up the yarn and casting on for the next.

With another week of solo knitting time looming in the near future, I have decided to start up three different projects. I pulled out the yarn for each, chewed my lip a little, and then wound them all off into balls. Patterns have been printed and copied, and I'm working on project baskets for each. I should digress a moment and mention how much I love my sock basket (an old Bath and Body Works gift basket) perfect for toting around yarn, needles, socks, pattern and assorted other items necessary for finishing off a pair of socks. I'm now searching through the house for appropriate containers for my other two projects.

The RSC July sock is now settled in its basket, waiting to be cast on. A pale violet Versatility is on size 10.5 KnitPicks Options (on the 32" circular cable). And a dark red/plum cashmere yarn is wound up into a ball, waiting to turn into fingerless mitts just in time for a change in the weather.

Sunday, September 21, 2008

Cleopatra's Stockings


Cleopatra's Stockings
Originally uploaded by Project Pictures
Oh, how I love new finished objects! I want to run around and make everybody see how very pretty they are. Joy!!

Last night and this morning saw the final touches on my Cleos. I must say that once I got the pattern in my mind, I hardly ever needed to refer to the charts. I made only one small modification--one I must remember on EVERY SINGLE slip-stitch-heel sock I ever do again. Instead of purling a row and then turning around to slip-one-knit-one, I swapped it around so that I knit a full row, and then slip-one-purl-one for a row. So much faster!

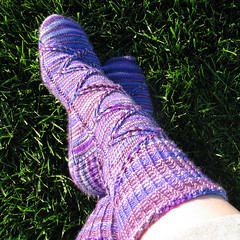
Traveling stitches have very little give. This sock is tricky to pull on your feet--certainly not a quick on-and-off sock. But once you wiggle it over the heel it is deliciously snug and doesn't sag. The twisted rib cuff is elegant and makes me want to wear cropped pants to show them off.

I'm extremely happy with the "lace bind off" or "decreasing bind off", whichever name it actually goes by. I've found both referenced on the internet. Elizabeth Zimmerman's "sewn bind off' is amazingly stretchy, but also quite a pain to pull back if you decide you want a slightly longer sock, or if the cuff is just plain old too tight. The decreasing bind off is almost as stretchy, especially if worked gently and loose, looks lovely, and is very easy to pull back out again. There are plenty of variations on this bind off, but here's what I use:

Decreasing, or Lace, Bind-Off
On final round:
Work the first two stitches in pattern, then k2tog-tbl
* work next stitch in pattern
k2tog-tbl new stitch with previous stitch
Rep from * until all stitches have been decreased off the needles.

Friday, September 19, 2008

Talk Like a Pirate Day

Casey, the amazing code monkey behind Ravelry, has jumped in once again with an impromptu "holiday" and given people parrots for Talk Like a Pirate Day! You simply need an appropriately file-named icon (I assume something with 'pirate' or 'buccaneer' or somesuch in the name, I haven't researched it fully) and BAM! you have a parrot added.

I love where my parrot fell out.. perfectly perched on my crossed needles. Many others have it settled quite nicely on one shoulder in proper piratical fashion.

Birthdays, today, also get pirate loot!

Wednesday, September 17, 2008

Earning my screen-name

Constant distractions are the name of the game lately. My DD (3.5 years) and DS (almost 1.5 years) have been wonderful. They have also been wonderful distractions. For the second time in two days I have found a major error in my Cleopatra's Stockings.

This is a beautiful pattern married with some truly lovely yarn in shades of blue and purple. Traveling stitches cross and recross up the instep and the back of the leg reminiscent of ribbons laced around the foot in ancient sandals. At my Monday night knitting group I got to the top of one of the crossings and found I had one spare stitch on one side and three spare stitches on the other. Ack!

After some diagnosis, I determined the error.. over twelve rows back. (Actually I'm still not sure exactly what I did wrong, but I know exactly where it was.) Since this pattern uses traveling stitches and this error offset those twisted stitches, my problem crossed over almost 14 stitches in those twelve rows.. one entire DPN. I winced at the mere thought of dropping an entire DPN back twelve rows and pulling back up stitches on these teeny-tiny-size-0 needles. Furthermore, not only was the problem going to involve a massive amount of re-knitting on that one panel of the sock, but because I am doing this on two sets of DPNs at the same time, I made the same mistake ON BOTH SOCKS. Horror! Maybe it would make sense to drop back that much for a sweater, but these are socks. How much are people really going to notice?

If it had been a smaller mistake, I might have tried to cover it up. I fussed at it for fifteen minutes, trying to figure out if I could twist one stitch over two to make up the difference or some other 'fix', and just couldn't get it to work. That angle was just wrong. It was going to show and it was going to bother me every time I wore the socks. So I pulled out my super-small needles (one set of 00's and one set of 000's) and wove them into the row just before the problem.... and then ripped out a couple hours of work. Whee.

Then yesterday, as I closed in on getting back to where I had been before Monday night, I found I had knit in yet another mistake. This time it was only one side of one sock over eight stitches. I grabbed a spare needle and laced it down the lower edge of the traveling stitches (to save me pulling up those stitches) and then dropped out the rest and knit them back up. I wish I had taken a picture of all the loops of hanging yarn and extra needles stuck in every which way. It was impressive if I have to say so myself. The gauge is just a wee bit wonky through that section, but I think it's going to pull itself nice and even after one wearing of the sock.

After this practice "tinking" I'm feeling rather proud of myself. My knitting friends think I'm a bit crazy. I'm earning a title of "process knitter", "perfectionist", "OCD", or perhaps just flat-out insane. I just know that I like for it to be correct, and I'm willing to practice any skill that will let me get it that way.

Friday, September 5, 2008

Sweet Stockinette Slippers

To keep things a bit more organized I've decided to move this to its own post. I fell in love with Sockpixie's Magic Slippers, but purling in the round drove me nuts. I decided to convert her pattern to (nearly) all knitting. There is one round of purling to accent the change from the sole to the uppers.

Here is my version:

Magic Slippers
Sweet Stockinette Slippers

Suggested Yarn: Approximately 1/2 oz fingering weight
Gauge: 7-8 sts/inch in stockinette stitch
Needles: Size 1 (2.25mm)

Note that the sole is knit in garter stitch, knitting back and forth, but the upper is knit stockinette in the round. If you need a bigger bootie, knit a longer sole and pick up as many more stitches at the transition as are needed.

Sole:
Long-tail cast on 7 stitches and knit 2 rows.
Repeat the next 2 rows until you have 15 stitches.
R1: K1, K1f&B, knit till 3 stitches are left, K1f&B, K2
R2: Knit

Knit even in garter stitch until work measures 2 1/2 inches from cast-on (30 rows)

Repeat the next 2 rows until you have 5 stitches left.
R1: K1, K2TOG, knit till 3 stitches are left, K2TOG, K1
R2: Knit

Transition:
Keep the remaining 5 stitches on your needle. Pick up and knit to a total of 60 stitches.

I use 4 dpns. I usually distribute the stitches for the upper in this manner:
3 (of the 5 sole sts) + 12 (from side) = 15
12 (from side) + 3 (pick up from toe) = 15
3 (pick up from toe) + 12 (from side) = 15
12 (from side) + 2 (of the 5 sole sts) + 1 (pick up between last 2 and next 3 of the remaining sts, this puts yarn in center of the heel) = 15


You'll notice this gives you 30 stitches per side, evenly divided from the center of the toe and heel.

Once you have all the stitches set up as you like, purl one round to transition from the garter-stitch sole to the stockinette upper.

Upper:
R1 (and all odd rounds): Knit
R2: K24, K2TOG, K8, SSK, K24
R4: K23, K2TOG, K8, SSK, K23
R6: K22, K2TOG, K8, SSK, K22
R8: K21, (K2TOG 3 times), (SSK 3 times), K21
R10: K18, (K2TOG 3 times), (SSK 3 times), K18
R12: K15, (K2TOG 3 times), (SSK 3 times), K15
R14: Bind off knitwise with lace bind-off.
(Knit first stitch, knit second stitch, slide left needle into the front of both stitches on the right needle and knit together. Continue until one stitch is left on the right needle. Pick up and knit from underneath the first bound-off stitch. Pass the second stitch over the new one. Pull the loop out long and cut a tail. Sew in end.)

Wednesday, September 3, 2008

Spoiler Warning

Yes, Mom, this means you...

I've added pictures of the finished project to Flickr. I have buried them deep in my photostream and added them in a new group (called "Spoilers") and unless you want to spoil your Christmas gift... DON'T PEEK!!

For everyone else... This is a great project. The pattern is lovely. The yarn is scrumptious. I blocked it twice to get it PERFECT. Yum.

Sunday, August 24, 2008

Goodness, gracious.. I got it DONE!

Last week I had a very nice time working on a couple of projects while my DH was away on business. It was a fortunate happenstance, in that I over-committed myself to Ravelympics projects, and having several hours a night to myself to knit made it possible to finish my booties, hat, shawl and washcloths.

That left the sweater.

I originally added the sweater as an afterthought on August 7th (all projects needed to be in by August 8th) as a "just in case" idea. After that I figured I should have added my Christmas knitting as a "WIP Wrestling" entry and finished it up. But as I had not, and this was in the queue, I went for it instead.


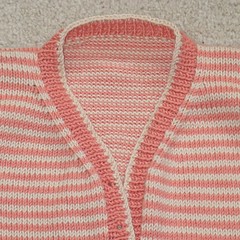
Striped Cardigan
Originally uploaded by Project Pictures
The yarn for this project was purchased at Stitches With Style in Newark, Delaware. If you're ever in the area, GO THERE. It is a wonderful store with a huge selection and crazy-friendly people. I had a great time knitting there while we were visiting our family. (I was given a "mom's afternoon off" and that's where I chose to go--a lucky pick on my part from a Google search on the area.) At any rate, when browsing through their selection I came across a pile of kits put together in Ziploc bags. Each included a book (Baby Cashmerino 2, by Debbie Bliss) and enough yarn for a particular project out of that book. In this case it was three balls of cream and three balls of coral-pink Debbie Bliss Baby Cashmerino yarn (Merino, microfiber, cashmere blend). And this stuff is just dreamy to touch.

I had knit up my practice-socks from Cat Bordhi's New Pathways for Sock Knitters using a ball of periwinkle-colored Baby Cashmerino I had picked up on sale, so I knew it was lovely and fun to use. I also want to knit a couple of sweaters for myself, but I'm leery of starting one while I'm still loosing weight. A baby sweater seemed like a fun place to start, and the price was right for the kit.

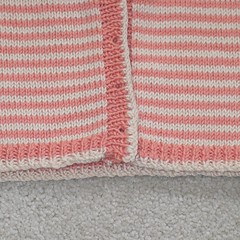
I used a cabled cast-on to start each piece. After knitting the back, I realized that if I "cheated" I could save myself some weaving in of the ends. So on subsequent pieces I cast on and then knit the first row the opposite way instead of exactly following the directions (knits for purls and vice versa). When done this way, your first row is actually the right (front) side of the work, rather than the wrong (back) side.

This let me slide the whole thing across my circular needle and start again with the right-side-facing on the second row. This is important because on the second row, you switch to the main color and knit five rows. If you don't get tricky like I did, your two ends of yarn are on opposite sides and you'll have to cut the CC to start the next row. Instead I was able to bring the CC up the side and just begin knitting the stripes.

The back, left front, right front, and sleeves are knit separately and then joined together with mattress stitch. I was pretty pleased that I wove in ends and blocked as I went along. Basically each day I knit one section, wove in ends as I went along wherever possible, and then soaked it through and stretched it out to block overnight. I ended up with a towel filled with pinned-out pieces all ready to be put together.

Once the front and back are joined at the shoulders, you pick up the appropriate number of stitches and knit the collar and button-band, then set in the sleeves. The "appropriate number" of stitches is a pain in the rear to spread out evenly across the front of the work. I resorted to math and a spread-sheet to plot out when I needed to skip a row in picking up stitches to make it all match up evenly. Then I had to DO it and that involved pulling out picked up stitches a few times until I got everything even.

I moved the button holes up two stitches from the bottom because it felt like the lowest one fell awfully close to the edge of the work. We'll see how that works out over time.

And last, I ended up ripping out my collar's bind-off. I tried a lace-bind-off first. After laying out the completed cardigan I was extremely unhappy that the very-stretchy bind off was bulkier than the ribbing, and made it fan and ripple. I went back and put a simple slipped-stitch bind off instead. It's very clean and looks lovely.

I got done just under the deadline to finish things for the Ravelympics. My post is up, and my Olympic knitting is done! Now back to our scheduled projects for the year!

Sunday, August 17, 2008

Leafy greens!


Foliage Hat
Originally uploaded by Project Pictures
Admittedly not my favorite vegetable to eat (give me green beans or broccoli first, any day!) This is one pretty, leafy-green hat! The pattern is Knitty's Foliage, with a number of modifications of my own, of course.

For starters, this hat is not knit with bulky or worsted-weight yarn as the pattern calls for, but with the leftover Mediumweight Socks That Rock from my Leafling socks. That makes it a heavy fingering weight yarn, just short of DK. I did several gauge swatches, and put my math to use figuring out how to make this work.

I didn't have enough leftovers to double the yarn and knit as written, plus I was really hoping to take advantage of the very pretty color-shifts which I hoped would stripe. I could knit the pattern as written, but on US3s, and come up with a child's hat. The original states its finished size as 17" stretching to 24" (that's a dang stretchy hat!). My guestimating put the as-written-but-fingering-weight-version at about 15" (or less) but stretching back to 19".

My other option was to expand the crown chart, which I ended up doing in a spreadsheet. I ended up with 33 stitches per needle, down to 32 stitches per needle after the last row of the crown (you decrease one stitch per needle on the very last row--a detail I almost overlooked when reading the pattern). I repeated the lace-pattern three times for the body of the hat and... ran out of yarn!


Foliage Hat
Originally uploaded by Project Pictures
A hurried plea to my sock-club's group on Ravelry yielded a kind gift of another person's left-over yarn (39 grams) to finish off the hat. In the meantime I worked on the Diamond Fantasy Shawl, finishing it up just as my emergency gift arrived. As I picked up the instructions to start up the hat again I noticed something odd--the decreases did not look the same as all those I had done before. I double-checked the instructions, knit a little more and scowled at myself. Slip one, knit two together, pass slipped stitch over.... yes. That matches. But it just doesn't look right .. what did I? Oh. Dear. Another project I had been working on just before the hat used a different double-decrease. Slip two as if to knit them together, knit one, and then pass both slipped stitches over the knit stitch... did that do it? Oh, yes. It did. Drat.

Rather than reknit the whole hat, I worked one round where every five stitches or so, I dropped one down and fixed my s1k2psso to the original decrease I used.

One more repeat of the lace pattern and I started the ribbing. For a while I toyed with doing a k2p2 rib. I really am not a fan of the "look" of a k1p1 rib. In the end I decided to stick with the pattern, mostly. I ended up extening the decreases of the lace-pattern into the ribbing. It's subtle but looks nice.

The body of the hat is just a tad long, but looks nice rolled in the front, framing my face a bit better than just a round-fit hat. I'm really pleased with the outcome and looking forward to sending my yarn-angel a little gift in thanks!